Adventure Nomad

Adventure Nomad

Monday, December 22, 2008

Cambodia: Photography Notes

It was my first night in Cambodia, and I was in a restaurant ordering an authentic Cambodian dinner:

“I’ll have the Amok Curry. Which is it better with; fish or beef?”
Fieef”, the waitress said.
“What was that again?” I said, "fish or beef?".
Fieeef”, she replied.
“Ok. That sounds good. I’ll have that.” I said.

I like surprises, and Cambodia would be full of them.

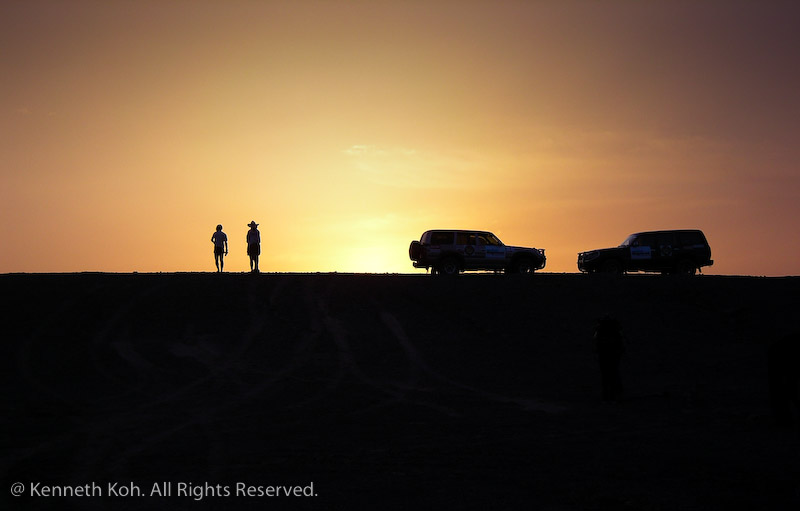
Sunset at Phnom Bakheng, Siem Reap. Nikon D300, 18-200mm, Program mode at -1 EV, 1/500 f/11, ISO 800.

One of the big surprises was the Cambodian people. I’d read about how it was not safe to travel at night, and given their war-torn history, I was expecting a crime ridden, battle-hardened, every-man-for-himself culture. Nothing could have been further from the truth. Cambodians are genuinely friendly, honest and have a strong sense of community. If you ask to take a picture of someone, you almost always get a positive response.

Photography Notes:
I brought my Nikon D300, 18-200mm VR and a 10.5mm Fisheye. While that two-lens combination works well when I need an ultralight setup, I would have been better served with a 12-24mm and 50-150mm combination. I pulled out the 10.5mm Fisheye whenever I needed something wider than 18mm (which was often), but the fisheye look gets old really quickly if you use it too much. The 12-24mm would have been better here, and when I needed more reach, it would have been a quick and easy swap for the Sigma 50-150mm out of my shoulder bag. I might have just thrown the fisheye into the bag as well because a fisheye is just too much fun!

Catch of the Day. Shot just after sunrise at a fishing village near Siem Reap. Nikon D300, 10.5mm Fisheye, Program Mode at -1/3 EV, 1/250 f/3.5, ISO 200, pop-up flash with 1/4 CTO gel at -1 FEV.

I did convert some shots to black and white. My visit to the S21 Tuol Sleng torture prison was a very sobering experience, and I felt that black and white was the way to convey that feeling across.

A visitor examines the prisoners quarters at Tuol Sleng. Nikon D300, 18-200mm, Program Mode at -1/3 EV, 1/50 f/3.5, ISO 1600. B&W conversion done in Lightroom.

I couldn’t have made my Angkor Wat sunrise shot without a tripod. A small tripod is certainly nice to have with you, and I brought along the Slik Sprint Mini with RRS BH-25 Ballhead.

Angkor Wat, in silhouette at Sunrise. Nikon D300, 18-200mm, manually exposed at 1/60 f/8, ISO 200, Slik Sprint Mini Tripod with RRS BH-25 Ballhead, graduated filter applied in post processing.

I've been getting comfortable using high ISOs with my D300. For night shots, I've been cranking up the ISOs. I will use ISO 3200 if the shot needs it, but it is pushing it. ISO 2000 yields very good results, and is my current high ISO 'limit'. Adobe Lightroom does a pretty good job dialing down the color and luminance noise.

MTV Exit Live in Concert at Angkor Wat. Nikon D300, 18-200mm, Aperture Priority at 1/25 f/4.2, ISO 2000.

And in case you were wondering what I was served that first night in Cambodia, it was beef.

Tuesday, December 16, 2008

The Ideal Adventure Bike

Joe touring in Tibet. Joe was racing his mountain bike in Asia, otherwise he would have used his LHT. Image courtesy of Joe Cruz.

I put down a deposit on a Surly Long Haul Trucker last week using the settlement that the insurance company paid me following my bike accident earlier this year. Since I didn’t know anything about touring bikes, I did the logical thing and asked for help in choosing a bike. My thanks to all the guys who took the time to answer my questions. *

Joe Cruz racing cyclocross. Image courtesy of Joe Cruz.

I’ve been in touch with Joe Cruz, a faculty member at the prestigious William’s College in Massachusetts and a very experienced, hardcore adventure bike tourer, over the past few weeks. Joe had this to say about the Surly LHT:

“When I started to plan longer and more serious trips and decided to invest in a dedicated bike, I did what we all do in buying gear. I tried to balance cost and my best info about durability and appropriateness for my needs, and I didn't go in thinking that I could find the absolutely perfect bike.”

“An adventure bike needs to be the following things:

- Versatile. I want to be comfortable pedaling for ten hours on asphalt, gravel or dirt, day after day; I want to be able to mount slicks and go on a training ride with the local road club when I'm far from home; I want to be able to ride pretty demanding singletrack; I want to be able to ride with panniers; at home, I want to a bike that might be decent on grocery runs. In practice, a bike is probably going to be good at a small number these things, but I want to be able to do them all and have the bike be at least reasonably up to it.

- Easy to ride. The geometry needs to be such that it doesn't take much vigilance from me to pilot. There are going to be times when I am at 17,000 feet, bonked, cold, and in the dark. My bike can't be yet another challenge. The thing is, I also want to be able to go fast on flat paved roads, or twisty road descents. And I want the bike to have good enough manners off-road. And when I'm in really dense urban areas, I want to be able to see traffic and be maneuverable.

- Durable. Basically I don't want to even think about the fragility of the bike. I'm not totally convinced that an aluminum frame is wrong for adventure touring, but if there is even a slight chance that I'll need someone to weld the thing while on the road, I don't want the option excluded. More realistically, if the derailleur hanger or the fork or whatever get bent, I want to just bend them back (within reason).

- Not overly precious or prissy. The bike is going to get roped to the roof of buses and the back of pack mules, clipped to a steel basket for a gorge crossing, or tossed in the bucket of an empty dump truck. I want to be able to shrug off the inevitable dents or nicks. Some airlines still allow you to check the bike unboxed. When it's an option, I want to be able to do that without caring that it might get scratched.

- Not have cost me a lot. The bike could get lost or stolen, and I don't want to be devastated. This is going to be relative, of course, but, for me, certainly under US$2000, while under US$1500 would be even better.

- Repairable on the road, all over the world. Stuff is going to break, and I want to be able to substitute and improvise with what is available to me locally until I can have specialized gear shipped.

Joe's Surly LHT: ruggedly equipped with cross brakes, downtube shifters and knobby tires. Image courtesy of Joe Cruz.

Given this wish list, I have not found anything better than the LHT. I've ridden it with panniers in Asia, Europe, Mexico, and, of course, at home in the US. I've raced it in mountain bike races (not my first or even second choice, but it happened) and on frozen lakes with Hakkapelitas. It goes along pretty good with slicks when I'm in the drops, I can mount 2.35 Nevegals on it for offroad, and on most tours running Marathon cross 1.5's is good enough for anything resembling a road or dirt path. On singletrack the bb is a little low for log hops, but riding the tops makes a lot of stuff surprisingly doable (I have top bar levers that you sometimes see on 'cross bikes, though I don't run them on my actual 'cross bike). If someone said that I could keep only one of my bikes, this one would be it.

Are there other bikes that could do these things? Yeah, probably. But some popular choices fall short for me. Thorns are a fair bit more expensive, and I have no interest in Rohloff hubs (heavy, their durability seems overstated, and junky but serviceable derailleurs are readily available to run with shifters in friction mode). I don't have any reliable info on how big a tire can be mounted on the Dawes offerings. The Rivendell Atlantis is a gorgeous bike, but that's also a downside. Some continental bikes look pretty good, but the Koga-Miyata's, for instance, are aluminum. And then anything with an integrated rack won't do for me when I want to take all the heavy stuff off and just go riding wherever I am. There are definitely steel mountain bikes that can be converted to adventure use, but they would have to have long chain stays for pannier heel clearance, couldn't be too flexy, and need a long headtube for drop bars (I've done long tours on flat bars and I don't care that much about not having the much ballyhooed multiple hand positions. But I like drops for going fast.)

What about the Salsa Fargo? I totally want one for riding here in the US. But as far as winning the adventure bike prize, the Fargo's wheel size is basically a deal breaker for me. My main endurance race bike is a singlespeed 29er, and I'm not looking back to 26ers as far as mountain biking goes. For better or for worse, though, the wheel size that came to be the American standard for mountain bikes in the 80's is now the most widely available around the world. Sure, a well build wheel isn't likely to implode, but in the overall scheme of bicycle components, the wheels are a worrisome blend of fragile/difficult-to-improvise/showstopper-if-you-don't-have-it. Moreover, though tires can be booted and stitched together, there is some wear and damage that just can't be readily managed.

You sometimes hear people say that in this era of global access to consumer goods, you can just have a wheel or a tire shipped to you wherever you are. There's something to that, but I've seen tires in shops and stalls in towns that don't have phones, let alone Internet. For a lot of places that I want to ride, there's a much higher premium placed by locals on the availability of bike tires than on having a post office.

Joe is currently touring in SE Asia. Here's his packed LHT. Image courtesy of Joe Cruz.

Other thoughts:

- If I was too tall to ride a 54 or smaller LHT, then I guess I'd convert an old mountain bike for adventure use. (note from me: LHTs in sizes 56 and larger use 700c wheels)

- What's my real basis for comparison? I've toured on a converted 1989 Wicked Fat Chance with rear panniers (West Coast of USA), a Santa Cruz Superlight pulling an Extrawheel trailer (Pakistan, India, Nepal, Tibet), a Karate Monkey with rear panniers (East Coast of USA), an 80's Bianchi steel road racing bike with a large Carradice seat post bag (USA, UK, China), a recent vintage Felt aluminum/carbon fiber race bike with seatpost bag (East Coast of USA, France), and a Bike Friday folding bike pulling its suitcase (East Coast of USA, Ireland, France, Spain). None of those were catastrophes. Indeed, the Superlight -- in spite of being absolutely wrong by every bit of conventional wisdom -- was probably the best. Of course, I was fortunate that neither the rear shock nor the suspension fork had any problems. The LHT is better than all of these.” **

“The LHT has the edge in that it gives you the peace of mind of knowing that nothing fancy is going to break, and that you can get into the drops and go fast into a headwind if you need to get somewhere. It's my go-to bike for all adventures now.”

* My thanks to Joe Cruz, Al Downie, Alvin Lee, Jeff Palmer and Dave Snowberg for the taking time to answer all my questions.

** Reprinted with permission from Joe’s post to the MTBR.com forum


The Surly Long Haul Trucker is available for SGD$1800 in Singapore at T.R. Bikes.

Saturday, December 13, 2008

Cambodia’s Dark History

The notorious S21 Tuol Sleng prison camp where the Khmer Rouge sysematically tortured and excuted some 17,000 prisoners. It is a chilling place to visit. Nikon D300, 18-200mm, 1/1000 f/16, ISO 200.

With throngs of visitors crowding the temples of Angkor today, it’s easy to forget Cambodia’s darker history, and we need to be reminded that it was only just 10 years ago that a few years ago that civil war and pockets of Khmer Rouge guerilla forces were still attacking villages.

Photo of a Photo: A young victim of the Khmer Rouge's S21 killing machine.

Khmer Rouge

During their 4 years in power (1975-1979), the Khmer Rouge attempted to turn Cambodia into a classless society by depopulating cities and forcing the urban population ("New People") into agricultural communes. The entire population was forced to become farmers in labor camps. During their four years in power, the Khmer Rouge overworked and starved the population, at the same time executing selected groups who had the potential to undermine the new state (including intellectuals or even those that had stereotypical signs of learning, such as glasses) and killing many others for even minor breaches of rules.1

A bed used for torture at the S21 Toul Sleng prison camp. Nikon D300, 18-200mm, 1/125 f/5.6, ISO 800.

It is estimated that between 1.4 million and 2.2 million (about 1/5 of Cambodia’s population) died by the hand of the Khmer Rouge, with perhaps half of those deaths being due to executions, and the rest from starvation and disease.

A display at the Landmine Museum in Siem Reap.

Landmines
Although all sides during Cambodia’s bloody war torn history laid landmines, the Khmer Rouge were perhaps the worst offenders, deliberately targeting the civilian population with mines and booby traps. It is generally accepted that more than 40,000 Cambodians have suffered amputations as a result of mine injuries since 1979. That represents an average of nearly forty victims a week over a period of twenty years. 2 With a population of 11.5 Miilion, this means that Cambodia has one amputee for every 290 people - one of the highest ratios in the world.3

One of Cambodia's landmine victims. Nikon D300, 18-200mm, 1/640 f/13, ISO 400.

The costs of laying mines are low, as little as $3 US per mine, but the costs of removal are very high, $1000 US per mine or more. 4 Cambodia still has an estimated 6 million mines in the ground. Cambodia’s legacy of landmines is estimated to take another 100 years to clear.4

Tok Vanna lost his arms in a landmine incident. Today he sells souvenirs in Siem Reap's tourist district. Nikon D300, 10.5mm, 1/250, f/10, ISO 200.

Sources:

1. Khmer Rouge - Wikipedia, the free encyclopedia.
2. Landmines in Cambodia, 1999.
3. Cambodia's landmine victims, 2003, BBC News
4. Cambodian Recent History and Contemporary Society: An Introductory Course

The Temples of Angkor

Stone Face at The Bayon. Nikon D300, 18-200mm, 1/640 f/13, ISO 800.

No trip to Cambodia is complete with visiting the temples of Angkor in Siem Reap. There, the ruins of a lost civilization continue to wow the modern visitor with its grandeur, architecture and intricate carvings. There’s a lot to see, but even if you are short on time, you should at least spend a day visiting the big three temples in Angkor.

Sunrise at Angkor Wat. Nikon D300, 18-200mm, 1/60 f/8, ISO 200.

Angkor Wat
Angkor Wat is the biggest religious structure in the world. The outer walls are over 2 miles long, the moat is as wide as 2 football fields, and the temple itself is as high as Notre Dame Cathedral. Angkor Wat is a representation of a symbolic Hindu universe. The temple itself symbolizes the five peaks of Mount Meru, the walls are distant mountains, and the vast moat are the oceans.

Wake up well before dawn to catch sunrise at Angkor Wat. You’ll need to prearrange a pickup with a Tuk Tuk driver. The complex opens at 5am, and you can buy a one-day pass (USD$20) on the way in.

Enter Angkor Wat from the west entrance and make your way in to capture sunrise. If you intend to photograph it, you’ll need a tripod. Once the sun comes up, the show is over, make your way out of Angkor Wat and head over to the South Gate of Angkor Thom and the Bayon.

Sanctuary at the Bayon. Nikon D300, 10.5mm, 1/250 f/5.6, ISO 800.

The Bayon
The Bayon is famous for its massive stone faces carved into the many towers of the temple. It is now thought that the faces are an amalgamate of King Jayavarman VII and Buddha. If you are here early enough, you should have the place pretty much to yourself but don’t stay too long, you’ll want to make your way over to the most photogenic temple before the crowds arrive.

A Monk at the temple of Ta Prohm. Nikon D300, 10.5mm, 1/250 f/5, ISO 800.

Ta Prohm

While some temples are so fully restored that they look as if its inhabitants had just moved out, Ta Prohm has been left in almost the same state as it was when it was first discovered. The reason for this is that the restoration workers wanted to find a balance between fully restoring a site and leaving it in its found state. At Ta Prohm, they have even left huge trees in place where the massive roots are slowly pushing the building blocks apart.

Exiting the Gates of Angkor Thom on a Motorbike. Nikon D300, 10.5mm, 1/250, f/22, ISO 200.

Ta Prohm is my favorite of the temples at Angkor. Hopefully, you’ll be able to get some good shots before the hordes of tourists arrive. Once they do, its time to head back to the Bayon where you can get some lunch, then spend the afternoon exploring the temple of Angkor Wat itself. If you still have the energy, head up to the hill temple of Phnom Bakheng to see the warm light of late afternoon on Angkor Wat. Stay for sunset, and then head back to town for dinner.

Wednesday, December 10, 2008

The Angkor Wat Half-Marathon 2008

Running Through the Angkor Thom South Gate. Ricoh GX100, 1/620 f/2.7, ISO 100. (click on photo to view larger)

I’ve just come back from two weeks in Cambodia, and while I did the usual looking around, I also took the time to run the Angkor Wat International Half-Marathon 2008. Held annually, this event organized by the Japanese, brings artificial limb support to land mine victims.

Me, standing next to a runner with an artificial leg.

The run starts soon after sunrise at Angkor Wat, and takes runners on a 21km anti-clockwise loop of the Angkor Complex. The first 10 km pass by quickly as runners are distracted by the many famous temples during the run: Banteay Kdei, Ta Prohm (made famous by the movie ‘Tomb Raider’) and the Bayon. Kids line the streets to high-five you as you run by. By the time you remember that it is a race, there are only a few kilometers left. When you cross the finish line, you get the feeling it was over much too quickly.

Running past the Bayon during the Angkor Wat Half-Marathon. Ricoh GX100, 1/540 f/2.7 ISO 100

It’s a good idea to bring a camera, although if you do, you can forget about getting a good time for the race because there is just so much to shoot! I used my trusty Sea & Sea 1G (rebadged Ricoh GX100) in a Lowepro neoprene case attached to my Fuelbelt. Water is provided every 2.5km and a never-ending string of locals come out to high five you during the race!

High Five Me! Ricoh GX100, 1/750 f/2.5 ISO 100.

A noble cause, welcoming locals and spectacular and historical scenery combine to make the Angkor Wat Half-Marathon one of the best runs in the world.

Inkimsan, who came in 5th in this year's Angkor Wat Half-Marathon, proudly displays his medals from previous races from all over the world that he recieves sponsorship to run. So precious are they that he keeps them with him wherever he goes on his motorbike.

For more photos of the race, please visit my Flickr site.

Sunday, November 23, 2008

Essential Gear for Jungle Trekking

St. Luke’s Prickly Heat Powder
Also sold as “Snake Brand”, this powder is widely available throughout South East Asia. It is marketed as “the original cooling, refreshing and soothing powder, which is effective in relieving itching, prickly heat rash, and skin irritation from hot weather”. One of the active ingredients is Triclocarban, which is an anti-bacterial and anti-fungal agent.

Adidas Kampung
These are cheap, super sticky rubber soled shoes with rubber uppers. I used my TNF Hedgehogs Mid GTX XCR and they were probably better performers, but at many times the cost. The ‘Kampung’ Adidas will do the job for only RM$5 (about USD$1.40) a pair. The only problem is that they may be hard to find outside of the kampung (village).
Adidas Kampung images courtesy of shoesjournal.blogspot.com

Homemade Citronella Repellent
I hate creepy crawlies, especially leeches. I keep them out by liberally applying DEET on my ankles and on my feet before I put my shoes on in the morning. It’s worked well for me, but the problem is that DEET gets absorbed into the bloodstream through the skin and long-term use has been linked to neurological damage, liver damage and cancer.

My friend Kiwi, who is much more experienced in the Jungle, uses a homemade concoction that can be more effective than store bought versions.

Kiwi’s Citronella Repellent Recipe
5% Citronella Essential Oil
45% water
50% Oil base (baby oil, virgin coconut oil, sunflower oil etc)
Mixed in a small spray bottle.

A Hammock
Sleep off the ground if you can. If you have to sleep on the ground, try to use a tent with a bathtub floor - A waterproof tent floor where the edges connect with the tent wall a few inches above the ground. This will keep the creepy crawlies out. If you have to sleep on the ground without any of these, clear the ground completely of dead leaves, which could hide leeches, scorpions or centipedes.

Wednesday, November 19, 2008

Cemerong-Berembun-Lansir Hike

The guys chilling out in the Sungei Cemerong. Nikon D300, 18-200mm,1/80 f/8, ISO200.

I’ve just returned from a 3 day/2 night backpacking trip to the Cemerong Forest Reserve in Terengganu, Malaysia. Malaysians are lucky. They have miles of pristine jungle trails and rivers of cold, crystal clear water.

Hiking, and lovin' it... NOT! Nikon D300, 10.5mm, 1/10 f/4.5, ISO200.

My friend, Kiwi, who runs the nearby Paka River Camp, invited me along for this trip that he’d organized for his son and a few of his son’s friends.

Come On In! The Water's Great! Nikon D300, 10.5mm, 1/50 f/8, ISO200.
From the Park Headquarters, we hiked from the bottom of Cemerong Waterfall to the top. At 640m, Cemerong Falls is one of the highest waterfalls in Malaysia. At the top, we did what must be the most insane thing I’ve done this year! We crawled over slimy rocks, slick with flowing water, out into the middle of the waterfall and peered down over the edge! I’m sure it must be safer than it looked to me because Kiwi wouldn’t let his son (or his son’s friends) do something stupid and dangerous.

Getting our 'macho' shot at the top of Cemerong Falls. From left: me, Yogi, Kisnu (our guide with the blue hat, obscured), Kelvin and Ee Feng. Marvin is taking the picture.

We spent the night in Camp ‘Y’ and hiked over the top of Gunung Berembun (1034m) the next day to Lansir Falls. It was a beautiful walk along a small trail beside the Sungei Lansir stream. The trail would crisscross the stream a few times. We spent our second night camped out on the granite shores Lansir Falls. Unfortunately, I don’t have any photos to show you because my camera died on the morning of the second day.

Friends helping out each other during the trek. Nikon D300, 10.5mm, 1/60 f/4.5, ISO1000.

The distance hiked each day was short, but if you looked at the distance and were expecting a short and easy walk, you’d be mistaken. The hiking was fairly technical, which is typical of this sort of jungle trek. There were a number of stream crossings, and some pretty steep ups and downs. In places where the trail splits, there may be no obvious signs which way to go. That, plus the lack of good maps, means that if you want to do this walk, you’ll probably need a guide. I suggest you email Kiwi at pakarivercamp@gmail.com or check out his website Paka River Camp for a heads up.

Kiwi (extreme left) supervising a Stream crossing. Nikon D300, 10.5mm, 1/100, f/4.5, ISO200.

On the third morning, we hiked back out, stopping along the way for yet another swim in another crystal clear, cold stream.

Sunday, November 9, 2008

The Homemade Alcohol Stove

Mark Jurey's Penny Stove. Photo by Forbes Conrad.

The lightest, cheapest, most reliable, easy-to-find-fuel-for, stove may be a homemade low-pressure alcohol stove.

Like a lot of backpackers, I’ve owned an assortment of stoves over my lifetime: Coleman (white gas), MSR (multi-fuel), Camping Gaz Bluet (canister), Esbit (solid fuel), Snowpeak Giga (Canister). My biggest problem is taking the stove on international flights, and finding fuel for it at my destination. I’ve never had an alcohol stove, but it seems to solve both these problems.

The low-pressure Penny Stove, designed by Mark Jurey, may be the best of the homemade alcohol stoves. Instructions on how to make your own can be found here. If you are unable to find a suitable Heineken can, you can make a similar stove out of soda cans, like this:


There are some precautions to be taken when using an alcohol stove. Tipping over a lit alcohol stove and having that spilled fuel ignite in a tent can be disastrous. Another drawback of this stove is that the flame can be almost invisible and trying to top up a stove that is still lit can be… er… very bad.

One good thing about making your own homemade alcohol stove (other than saving money) is that you will be recycling aluminum cans, and keep another gas canister out of the landfill.

Update Nov 13:
Well, I've built my first Soda Can Stove. It took me about an hour and some. The design is pretty forgiving. I didn't didn't use any high temperature tape or adhesive, and I used the smallest drill bit I had (1.5mm) and made just 8 holes. It works well. Here's a template to help you out, courtesy of zenstoves.net. Incidentally, here in Singapore, our Heineken cans are shaped just like regular beverage cans, so I couldn't make Mark Jurey's Penny Stove.

Friday, October 24, 2008

How To Buy Your 2nd Mountain Bike

The Perfect Ride. Canon XT/350D, 10-22mm, 1/60 f/5, ISO400.

We’ve all made mistakes with our 1st mountain bike, perhaps buying a cheap, heavy, klunker that didn’t fit right. Now you’re ready for your next bike and are determined not to repeat the mistakes of the past. While you may have bought your first bike as a complete bike set from the showroom, your next bike is likely to built up, ie. buying the frame, wheels and other components separately. This gives your bike a more personal feel and you end up only paying for what you really want on the bike.

Do your research
There is more to building a frame than welding a bunch of metal tubes together. Full suspension or hardtail? Aluminum vs. Titanium vs. Carbon vs. Steel? V-brakes or Discs? It comes down to personal preference, riding style, riding conditions, and sometimes even marketing hype. Websites like www.Mtbr.com have a wealth of information and reviews.

What I ride: The 2006 Santa Cruz Superlight. Single-pivot full suspension aluminum bike with V-brakes. I travel with my bike and I need something light and simple.

Going places with my bike. Hoisting my Santa Cruz Superlight across a bamboo bridge in Northern Thailand. Taken by Laura Liong with my Pentax Optio 43WR, 1/160 f/6.9, ISO 64.

Don’t buy cheap components
Go Shimano XT or XTR if you can afford it. Upgrade lesser parts to at least Shimano XT, particularly the rear derailleur and cassette. LX is ok, but XT components are much more durable and are much more pleasant to use than lesser components like (shudder) Alivio. The cheap cassette on my first bike wore out after three months. The cheap headset on my 2nd bike needed to be changed after just 2 weeks. By comparison, most of my Shimano XTR parts have been with me since 2002. Sure, parts do wear out over time, but good components last much longer and will pay for themselves over the long run. You'll also get a more positive riding experience.

What I use: Shimano XTR except for SRAM X0 twist shifters and rear derailleur.

Get Fit
A proper bike fit is more than straddling the bike and checking the clearance between your crotch and the top tube. It is best if your bike shop can do a proper fit, otherwise websites like www.competitivecyclist.com have a mountain bike fit calculator that uses a few simple body measurements like your inseam, torso, forearm length, and give you output such as what standover height, top tube length, stem length you need. It’s free and it takes about 20 minutes. It is well worth the time and effort. You may find out that your dream bike manufacturer may not make a frame in your size. For example, I liked the Specialized brand, but they didn't make a frame that would fit my long torso/short legs body. They made a 15.5" frame that was too cramped for me and a 17" that didn't have sufficient standover clearance. I had to look elsewhere.

Ride it
Finally, there’s nothing like riding the bike you want to buy. Ideally, your buddy is your size and has your dream ride that you can borrow, otherwise your bike shop should let you take a quick spin around the parking lot. Sometimes, a quick ride is enough to reveal that your dream ride isn't it all what you thought it was going to be.

Updated: 26 Oct 08 (expansion and clarification).

Thursday, October 23, 2008

When Gear Lust Strikes

AF-S NIKKOR 50mm f1.4G

Nikon has announced a new 50mm lens with a ‘Silent Wave’ motor, the Nikon 50mm f/1.4G AF-S, but at $USD 440, it ain’t cheap.

With the announcement of this new lens, it occurred to me that I could now get a pretty good deal on a used non AF-S 50mm f/1.4. I began researching the older, non-AF-S 50mm lenses, like the f/1.4 and the f/1.8. Then it struck me. When would I use this lens? While it sounds like it will make a good portrait lens on my D300, I prefer to do portraits with a zoom lens like my Sigma 50-150mm f/2.8. For general low light photography, I’ve found the 50mm focal length to be a little too long on my D300, and I’d be better off with a Sigma 30mm f/1.4. I suppose I could benefit from the sharpness of the 50mm prime lens for product photography, but that’s not really my thing, and I don’t do much of it.

In the end, the urge to buy something new and shiny has given way to reason (for now ;)

Saturday, October 18, 2008

How To Grow Your Hair Long

Want to look like this guy? Josh Holloway as 'Sawyer' on Lost (ABC). Image from www.tvscoop.tv.

It was about a year ago that I resigned from my job as an airline pilot and decided to keep my hair long. I thought it would be cool and in keeping with my new career choice as a photographer. I also thought it would save me money from getting regular haircuts and having to buy and use gel and other styling products. I also thought it would simplify my life, not having to worry about styling my hair and just tying it up in a ponytail every morning. All my assumptions turned out to be wrong!

Had I known what I know now about keeping my hair long, I might have decided otherwise. But it’s hard to find information about keeping long hair for guys. My sisters turned out to be a big source of information. Here’s what I’ve learned:

0-2 months: Hair in your eye
From here on out, hair will either be poking you directly in the eye, or covering your eyes when it grows out. You’ll need to do something to keep it from irritating you. It’s too short to tie back, so your best bet is an ‘Alice Band’, a horseshoe shaped headband. Buy a couple. They break and you’ll also need one for the bathroom for when you wash your face.

4-6 months: Hair in your mouth

You may have heard that it’s best not to cut your hair if you want it to grow fast. That may be true, but I had really short hair and the back was growing out faster than the front. I found it best to trim the back every couple of months so that the front could catch up.

It is probably still a little too short to tie back, so wisps of hair will escape your ponytail and end up in your mouth when you are eating, or simply drift across your face, irritating you to no end. A combination of the Alice Band to hold up the hair in front and tying a high ponytail will keep the sides in check.

8 -12 months: Hair touching your chin (aka ‘The Sawyer’)

Finally, the front has grown long enough to balance the back, and so you don’t really need to cut it anymore. It’s now long enough to be tied up into a high ponytail so it is out of your face. And it’s now sort of ‘cool’ looking, kind of like the guy in the picture. Quite frankly, Josh Holloway would look good with any kind of haircut and if I looked like him, I wouldn’t have bothered with the effort of growing my hair long in the first place.

How to cut your hair like Josh Holloway. www.hairfinder.com

But was it worth it? Long hair is more prone to falling out and breaking, so whatever money I save on haircuts will go towards buying products like hair conditioners and strengtheners. It hasn’t simplified my life either as I’ve now got to put up with the hassle of where to put all that extra hair when I do sports.

Hmm… Well, maybe having long hair is cool, but having NO hair is kind of cool too. Vin Diesel looks good bald. I might give that a go when I’m done with the longhaired look.

Thursday, October 16, 2008

The Great Singapore Housing Bubble

Written by me
... with a little help from my retired Investment Banker wife


When my wife and I quit our jobs and sold our house last year, it was with the expectation that housing prices were near its peak and would soon fall. We were wrong and prices continued to skyrocket to new all time highs. Basically, housing prices doubled from late 2006 to early 2008. Now, at a time when we are facing the worst financial crisis since the Great Depression, the latest URA statistics of private residential property show that prices have dropped for the 1st time since 2006, but by only 1.8%*. Is this an accurate reflection of the private property market in Singapore?

Working out at our old house in better times.

It all began with the sub-prime housing crisis in the USA. The banks lent out easy money, and as long as property prices continued to rise, the party could go on. Sound familiar? Well, the same thing has happened in Singapore, with a twist.

We had a unique phenomenon called the ‘En Bloc sale’. In simple terms, an ‘En Bloc sale’ occurs when the majority of owners of a housing development, such as a condominium, get together and collectively sell the condo off to a developer. The developer, in turn, then tears down the existing structure and rebuilds a new condo with greater density, and sells those units off at a profit. This was possible because older condos didn’t have the same population density as new condos. Developers could buy out 1000 people, and build units in that same plot of land that can house 3000 or more.

En Bloc fever reached its peak in 2007, and created a double whammy. En Bloc sales removed housing supply from the market and created short term demand from En Bloc’ers seeking new housing. New houses can’t be built overnight, and this added fuel to soaring property prices.

With easy lending policies, individuals began borrowing money to buy more property, hoping to cash in on the rapidly rising property market. In an environment of unprecedented demand, it worked, and some individuals doubled their money in a relatively short time. In 2007, 14,811 units were taken-up, compared to the average annual take-up of 6,600*.

Our Lotus at the old house. (We sold both and are now debt free, but we now live in a rental and drive a Hyundai).

Are we ripe for the Singapore housing bubble to burst?

The Fundamentals: Supply vs. Demand
There is strong upcoming supply. Over 31,000 units are already under construction: 15,000 to be completed by 2009, and most of the balance should be completed by 2011. This significantly outstrips the 6,600 average annual demand**. (Take-ups in the first 3 quarters of ’08 (Jan to Sep) was 3,890 Units, just under the statistical annual average*).

Market Sentiment: Accelerating The Fundamentals.
When the property market was booming, sentiment was so good that any excuse was used to talk up the market, regardless of whether it had any real impact: F1, IR. There seemed no end to blue skies. Now, there seems no end in sight for the current crisis. There is global asset deflation. Singapore GDP growth for 2008 was projected at 6.5% at the start of the year, now, we are hoping for around 3% for the full year, i.e. down more than 50% from the projection early this year. The Singapore stock market is down more than 40% since the start of the year; Singapore property stocks have fallen up to 70%. Job insecurity will start to sink in and unemployment will rise. Expatriate influx will slow. Private property rentals will drop. The banks will further tighten lending standards. Overextended individuals holding multiple properties and small property developers will go bankrupt.

We used to have lots of fish in a big pond. Photo © Laura Liong

When will the bubble burst? Not this year, and perhaps not even the next, but it will happen. I'm not a property expert, but it is my humble opinion that the writing is on the wall, and it is plain for all to see.


* The Straits Times, Money, 16 Oct ‘08
** Credit Suisse, Singapore Property Sector Review, 29 Sep ’08.

Friday, October 10, 2008

End of Days

End of the Day, Gobi Desert, China. Pentax Optio 43WR, 104mm (35mm equiv.), 1/400, f/3.9, ISO 50.

It’s been a tough week for the world financially, and my wife and I have not escaped unscathed. Our savings, put aside in various investments have shrunk considerably. To top the week off, I had my first DNF in a race ever. I pulled out of The North Face Ultra 100 in Singapore last week. That was very disappointing, considering the amount of training time I put into it. Let’s hope next week looks a little brighter.

Tuesday, September 30, 2008

Singapore Night F1: Fast Cars, Low Light

Nick Heidfeld, BWM Sauber. Nikon D300, 50-150mm at 150mm, 1/320, f/2.8, ISO 2000.

What camera gear do you need to shoot the Singapore Night F1? Speed is the key: High frame rates, fast glass, fast shutter speeds, and clean high ISOs. Ideally, we’ll each have a full-frame camera like the Nikon D3 or Canon 1Ds Mk III with a 300mm f/2.8 lens to do the job. Well… I can dream, can’t I?

We can get the same field of view on a crop sensor camera like the Nikon D300/D90 or Canon 50D/40D/etc with a 70-200mm f/2.8 lens. Throw in a 1.5x teleconverter, and an ultra-wide zoom for crowd shots, and you’ve got a very versatile kit for walking around the circuit.

Any Ferrari Fans Here? The crowd along the Raffles Avenue straight during Practice. Nikon D300, 12-24mm.

A walkabout ticket is the cheapest, and ironically, will get you closest to the action. Prior to the actual race, it’s a good idea to scout out where you want to be during the practice/qualifying session.

You’ll need to get as close to the safety fence as you can. The closer you are to the fence, the easier it is to defocus the fence. Typically though, you will be at least 1.5m away from the fence. Using a large aperture will also help to defocus the fence, making it almost invisible.

Lap #1. The crowd rises to get some shots. From the back, it's difficult to throw the fence out of focus. You'll need to get closer.

The fence will also cause autofocus problems. Either slow down the AF reaction to stop it from jumping between the car and the fence (good luck there) or use Manual Focus and pre-focus on a spot on the track and wait for a car to reach it.

Not Sharp Enough. Jenson Button of Honda being chased by Heikki Kovalainen of Mclaren-Mercedes. Nikon D300, 80-400mm at 340mm, 1/250, f/5.3, ISO 3200.

What about the lightweight travel photography equipment that I use? My 80-400mm f/4.5-5.6 had the right focal range, but with a maximum aperture of f/5.6, it was just too slow. With the slow shutter speeds I was forced to shoot with, none of my head-on shots were sharp. My best chance to get a good shot was to pan shots. I.e. follow focus on the car as it passes. Still, that’s all I had, so I kept shooting… and hoped I’d get lucky.

Lucky Shot. Lewis Hamilton, Team McLaren-Mercedes, being chased by Ferari's Kimi Raiknonen. Nikon D300, 80-400mm at 400mm, 1/160, f/5.6, ISO 2000.

Best accessories to bring?
A stool or 3-step ladder to stand on (if you can get it through security), and/or a tripod or monopod.

Sunday, September 28, 2008

Feel The Thunder

Uniquely Singapore F1. Nikon D300, 12-24mm at 16mm, 1/30, f/4, ISO 3200.

F1 comes to Singapore as the world’s first night F1 race. It’s a street circuit, very accessible, and I’m probably just 4 or 5m (13-16’) away from the cars at Turn #5. Feel the thunder? You bet!

Fernando Alonso Wins the Singapore F1. Nikon D300, 50-150mm at 150mm, 1/320, f/2.8, ISO 2000.

The Lucky: Team Renault

Renault’s Fernando Alonso had the fastest time in practice, but due to a mechanical problem during qualifying, he started the race in 15th position. As luck would have it, a series of incidents with pit lane errors, crashes and the deployed safety cars, catapulted Alonso into the lead around the middle of the race. Not to take anything away from Alonso, he drove superbly all night.

Close enough for you? Felipe Massa, Ferrari, Turn #5. Nikon D300, 80-400mm at 400mm, 1/125, f/5.6, ISO 2000.

The Unlucky: Team Ferrari

In a racecourse known to be tight and bumpy making overtaking difficult, Ferrari started the race in poised to win with their drivers in 1st and 3rd postions. Felipe Massa started the race in pole position but after a pit lane error, which saw him driving off with the fuel hose still attached to his car, he eventually finished 13th. Ferrari were still gunning for constructor points until Kimi Raikkonen crashed out at turn #10 with 4 laps to go. Really bad luck for Ferrari tonight, and I really feel bad for Felipe Massa who was driving really well too. Ah well, that’s racing… and Ferrari will be back.

The Night F1 Circuit set against the Singapore City Skyline on the Esplanade Bridge. Nikon D300, 12-24mm at 24mm, 1/60, f/4, ISO 3200.

The WINNER: Team Singapore

It costs SGD$150 Million annually to host the event, the world’s first night F1 race. The plan to showcase the city and boost Singapore’s image as a vibrant city seems to have worked. By all accounts, this event was wildly successful, and next years race promises to be even better.


By The Numbers:
Over 1,500 special track lights to turn night into day
3.2 Million Watts of power
Over 100,000 spectators
500 Million viewers worldwide
Biggest grandstand in F1 (seating 32,000)
SGD$150 Million price tag per year